今回はAndroid向けのスマホアプリ作成に挑戦します。もちろん広告も入れます。現在使っているGoogle/AdSenseのアカウントを使って収益化するにはどうすればよいでしょうか?
AdMobで収益化
この場合は AdMob で収益化するのがよい方法です。Google公式にも、既存のAdSenseアカウントに使っているGoogleアカウントでAdMobへ申し込むと、AdMobとAdSenseがリンクされると明記されています。
Web広告であればAdSense、スマホアプリであればAdMob。2種類の広告収益を、同じGoogleのパブリッシャー関連アカウントで管理できます。
1ユーザーにつき複数アカウントを作ることは認められていないので、Web広告用とスマホアプリ用に別々のAdSenseアカウントを作ってはなりません。
まずはここからアカウントを作ります。すでにGoogle/AdSenseのアカウントを持っているのであれば、同じアカウントを使います。
アカウントが作成されたら「最初のアプリを追加する」を選択します。広告の種類を選択して確定させると
ca-app-pub-xxxxxxxxxxxxxxxx~xxxxxxxxxx
ca-app-pub-xxxxxxxxxxxxxxxx/xxxxxxxxxx
というふたつのIDが発行されます。前者がアプリID、後者が広告ユニットIDです。両者を混同しないようにしてください。
.NET MAUI Blazor Hybridでスマホアプリを作る
管理人は C# と JavaScript をよく使っているのでスマホアプリを作るときもできればこれらの言語を使いたいです。よい方法はあるのでしょうか? この場合は .NET MAUI Blazor Hybrid がよい選択です。
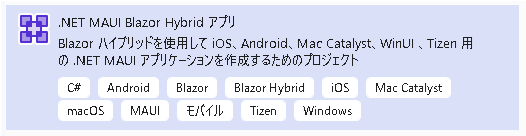
プロジェクトをつくるときは「サンプルページ」のチェックははずしてください。
AdMob の広告を入れたいので NuGet で Plugin.AdMob を入れます。.NET 10.0 であれば最新のものをインストールすればよいし、.NET 9.0 であれば Plugin.AdMob 3.02 をインストールすればよいです。
まず MauiProgram.cs を編集します。変更は 2 箇所です(コード内のコメントを参照)。
MauiProgram.cs
|
1 2 3 4 5 6 7 8 9 10 11 12 13 14 15 16 17 18 19 20 21 22 23 24 25 26 27 28 29 |
using Microsoft.Extensions.Logging; using Plugin.AdMob; // ← これを追加 namespace MauiApp1 { public static class MauiProgram { public static MauiApp CreateMauiApp() { var builder = MauiApp.CreateBuilder(); builder .UseMauiApp<App>() .UseAdMob() // ← これを追加 .ConfigureFonts(fonts => { fonts.AddFont("OpenSans-Regular.ttf", "OpenSansRegular"); }); builder.Services.AddMauiBlazorWebView(); #if DEBUG builder.Services.AddBlazorWebViewDeveloperTools(); builder.Logging.AddDebug(); #endif return builder.Build(); } } } |
次に Platforms\Android\AndroidManifest.xml を以下のように変更します。追加するのはアプリIDです。広告IDではないので注意してください。
Platforms\Android\AndroidManifest.xml
|
1 2 3 4 5 6 7 8 |
<?xml version="1.0" encoding="utf-8"?> <manifest xmlns:android="http://schemas.android.com/apk/res/android"> <application android:allowBackup="true" android:icon="@mipmap/appicon" android:roundIcon="@mipmap/appicon_round" android:supportsRtl="true"> <meta-data android:name="com.google.android.gms.ads.APPLICATION_ID" android:value="ca-app-pub-xxxxxxxxxxxxxxxx~xxxxxxxxxx" /> </application> <uses-permission android:name="android.permission.ACCESS_NETWORK_STATE" /> <uses-permission android:name="android.permission.INTERNET" /> </manifest> |
次に MainPage.xaml を以下のように変更します。これで画面下部に広告が表示されます。広告の高さは 50ピクセルです。AdUnitId で指定するのは広告ユニットIDです。”ca-app-pub-3940256099942544/9214589741″ を指定していますが、テスト段階ではこれを指定します。するとテスト広告が表示されます。テストが終わって正式リリースするときに先ほど取得した広告ユニットIDと入れ替えます。
また “MauiApp1” という文字列がありますが、これはプロジェクトの名前です。
MainPage.xaml
|
1 2 3 4 5 6 7 8 9 10 11 12 13 14 15 16 17 18 19 20 21 22 23 24 25 26 27 28 |
<?xml version="1.0" encoding="utf-8" ?> <ContentPage xmlns="http://schemas.microsoft.com/dotnet/2021/maui" xmlns:x="http://schemas.microsoft.com/winfx/2009/xaml" xmlns:local="clr-namespace:MauiApp1" xmlns:components="clr-namespace:MauiApp1.Components" xmlns:admob="clr-namespace:Plugin.AdMob;assembly=Plugin.AdMob" x:Class="MauiApp1.MainPage"> <Grid RowDefinitions="*,Auto"> <BlazorWebView Grid.Row="0" HorizontalOptions="Fill" VerticalOptions="Fill" HostPage="wwwroot/index.html"> <BlazorWebView.RootComponents> <RootComponent Selector="#app" ComponentType="{x:Type components:Routes}" /> </BlazorWebView.RootComponents> </BlazorWebView> <admob:BannerAd Grid.Row="1" HeightRequest="50" AdUnitId="ca-app-pub-3940256099942544/9214589741" HorizontalOptions="Fill" VerticalOptions="Center" /> </Grid> </ContentPage> |
収益化するのであれば作成したアプリは GooglePlay に登録しなければならないのですが、このとき Android 16(API レベル 36)以降でなければなりません。Visual Studio 2026 なら別に問題ないのですが、Visual Studio 2022 の場合は MauiApp1.csproj(プロジェクト名でファイル名は変わる)を以下のように変更します。
変更箇所は
|
1 2 |
<AndroidTargetSdkVersion>36</AndroidTargetSdkVersion> <TargetFrameworks>net9.0-android36.0;net9.0-ios;net9.0-maccatalyst</TargetFrameworks> |
の 2 行の追加と、数カ所存在する “net9.0-android” を “net9.0-android36.0” に置き換えている点です。
MauiApp1.csproj
|
1 2 3 4 5 6 7 8 9 10 11 12 13 14 15 16 17 18 19 20 21 22 23 24 25 26 27 28 29 30 31 32 33 34 35 36 37 38 39 40 41 42 43 44 45 46 47 48 49 50 51 52 53 54 55 56 57 58 59 60 61 62 63 64 65 66 67 68 69 70 71 72 73 74 75 76 77 78 79 80 81 82 83 84 85 86 87 88 89 90 91 92 93 94 95 96 97 98 99 100 101 102 103 104 105 106 107 108 109 110 111 112 113 114 |
<Project Sdk="Microsoft.NET.Sdk.Razor"> <PropertyGroup> <TargetFrameworks>net9.0-android36.0;net9.0-ios;net9.0-maccatalyst</TargetFrameworks> <TargetFrameworks Condition="$([MSBuild]::IsOSPlatform('windows'))">$(TargetFrameworks);net9.0-windows10.0.19041.0</TargetFrameworks> <OutputType>Exe</OutputType> <RootNamespace>MauiApp1</RootNamespace> <UseMaui>true</UseMaui> <SingleProject>true</SingleProject> <ImplicitUsings>enable</ImplicitUsings> <EnableDefaultCssItems>false</EnableDefaultCssItems> <Nullable>enable</Nullable> <ApplicationTitle>【アプリの名前】</ApplicationTitle> <ApplicationId>【アプリケーションIDを逆ドメイン形式で指定(例:com.hatodemowakaru.firstapp)】</ApplicationId> <ApplicationDisplayVersion>1.0</ApplicationDisplayVersion> <ApplicationVersion>1</ApplicationVersion> <AndroidTargetSdkVersion>36</AndroidTargetSdkVersion> <WindowsPackageType>None</WindowsPackageType> <SupportedOSPlatformVersion Condition="$([MSBuild]::GetTargetPlatformIdentifier('$(TargetFramework)')) == 'ios'">15.0</SupportedOSPlatformVersion> <SupportedOSPlatformVersion Condition="$([MSBuild]::GetTargetPlatformIdentifier('$(TargetFramework)')) == 'maccatalyst'">15.0</SupportedOSPlatformVersion> <SupportedOSPlatformVersion Condition="$([MSBuild]::GetTargetPlatformIdentifier('$(TargetFramework)')) == 'android'">24.0</SupportedOSPlatformVersion> <SupportedOSPlatformVersion Condition="$([MSBuild]::GetTargetPlatformIdentifier('$(TargetFramework)')) == 'windows'">10.0.17763.0</SupportedOSPlatformVersion> <TargetPlatformMinVersion Condition="$([MSBuild]::GetTargetPlatformIdentifier('$(TargetFramework)')) == 'windows'">10.0.17763.0</TargetPlatformMinVersion> <SupportedOSPlatformVersion Condition="$([MSBuild]::GetTargetPlatformIdentifier('$(TargetFramework)')) == 'tizen'">6.5</SupportedOSPlatformVersion> <Product>$(AssemblyName)</Product> <Title></Title> </PropertyGroup> <PropertyGroup Condition="'$(Configuration)|$(TargetFramework)|$(Platform)'=='Debug|net9.0-android36.0|AnyCPU'"> <ApplicationTitle>【アプリの名前】</ApplicationTitle> <AndroidUseAapt2>True</AndroidUseAapt2> <AndroidCreatePackagePerAbi>False</AndroidCreatePackagePerAbi> <AndroidPackageFormat>aab</AndroidPackageFormat> <ApplicationDisplayVersion>1.0</ApplicationDisplayVersion> <ApplicationVersion>1</ApplicationVersion> </PropertyGroup> <PropertyGroup Condition="'$(Configuration)|$(TargetFramework)|$(Platform)'=='Debug|net9.0-ios|AnyCPU'"> <ApplicationTitle>【アプリの名前】</ApplicationTitle> <ApplicationDisplayVersion>1.0</ApplicationDisplayVersion> <ApplicationVersion>1</ApplicationVersion> </PropertyGroup> <PropertyGroup Condition="'$(Configuration)|$(TargetFramework)|$(Platform)'=='Debug|net9.0-maccatalyst|AnyCPU'"> <ApplicationTitle>【アプリの名前】</ApplicationTitle> <ApplicationDisplayVersion>1.0</ApplicationDisplayVersion> <ApplicationVersion>1</ApplicationVersion> </PropertyGroup> <PropertyGroup Condition="'$(Configuration)|$(TargetFramework)|$(Platform)'=='Debug|net9.0-windows10.0.19041.0|AnyCPU'"> <ApplicationTitle>【アプリの名前】</ApplicationTitle> <ApplicationDisplayVersion>1.0</ApplicationDisplayVersion> <ApplicationVersion>1</ApplicationVersion> </PropertyGroup> <PropertyGroup Condition="'$(Configuration)|$(TargetFramework)|$(Platform)'=='Release|net9.0-android36.0|AnyCPU'"> <ApplicationTitle>【アプリの名前】</ApplicationTitle> <AndroidPackageFormat>aab</AndroidPackageFormat> <AndroidUseAapt2>True</AndroidUseAapt2> <AndroidCreatePackagePerAbi>False</AndroidCreatePackagePerAbi> <ApplicationDisplayVersion>1.0</ApplicationDisplayVersion> <ApplicationVersion>1</ApplicationVersion> </PropertyGroup> <PropertyGroup Condition="'$(Configuration)|$(TargetFramework)|$(Platform)'=='Release|net9.0-ios|AnyCPU'"> <ApplicationTitle>【アプリの名前】</ApplicationTitle> <ApplicationDisplayVersion>1.0</ApplicationDisplayVersion> <ApplicationVersion>1</ApplicationVersion> </PropertyGroup> <PropertyGroup Condition="'$(Configuration)|$(TargetFramework)|$(Platform)'=='Release|net9.0-maccatalyst|AnyCPU'"> <ApplicationTitle>【アプリの名前】</ApplicationTitle> <ApplicationDisplayVersion>1.0</ApplicationDisplayVersion> <ApplicationVersion>1</ApplicationVersion> </PropertyGroup> <PropertyGroup Condition="'$(Configuration)|$(TargetFramework)|$(Platform)'=='Release|net9.0-windows10.0.19041.0|AnyCPU'"> <ApplicationTitle>【アプリの名前】</ApplicationTitle> <ApplicationDisplayVersion>1.0</ApplicationDisplayVersion> <ApplicationVersion>1</ApplicationVersion> </PropertyGroup> <ItemGroup> <MauiIcon Include="Resources\AppIcon\appicon.svg" ForegroundFile="Resources\AppIcon\appiconfg.svg" Color="#512BD4" /> <MauiSplashScreen Include="Resources\Splash\splash.svg" Color="#512BD4" BaseSize="128,128" /> <MauiImage Include="Resources\Images\*" /> <MauiImage Update="Resources\Images\dotnet_bot.svg" BaseSize="168,208" /> <MauiFont Include="Resources\Fonts\*" /> <MauiAsset Include="Resources\Raw\**" LogicalName="%(RecursiveDir)%(Filename)%(Extension)" /> </ItemGroup> <ItemGroup> <PackageReference Include="Microsoft.Maui.Controls" Version="$(MauiVersion)" /> <PackageReference Include="Microsoft.AspNetCore.Components.WebView.Maui" Version="$(MauiVersion)" /> <PackageReference Include="Microsoft.Extensions.Logging.Debug" Version="9.0.8" /> <PackageReference Include="Plugin.AdMob" Version="3.0.2" /> </ItemGroup> <ItemGroup> <Compile Update="Properties\Resources.Designer.cs"> <DesignTime>True</DesignTime> <AutoGen>True</AutoGen> <DependentUpon>Resources.resx</DependentUpon> </Compile> </ItemGroup> <ItemGroup> <EmbeddedResource Update="Properties\Resources.resx"> <Generator>ResXFileCodeGenerator</Generator> <LastGenOutput>Resources.Designer.cs</LastGenOutput> </EmbeddedResource> </ItemGroup> </Project> |
アプリを作ってみる
実際になにか動くアプリを作ってみることにします。ここではとりあえず動いてくれればなんでもいいので、タップした位置に32×32ピクセルの画像が移動するだけのゲームの原型をつくります。
まず Components\Pages フォルダのなかにある Home.razor を以下のように変更します。
Components\Pages\Home.razor
|
1 2 3 4 5 6 7 8 9 10 11 12 13 14 15 16 17 18 19 20 21 22 23 24 25 26 27 |
@page "/" @inject IJSRuntime JS <div id="game-page"> <div id="game-container"> <canvas @ref="canvas"></canvas> </div> <div class="ad-container"> <div id="ad-placeholder"> <!-- AdMobはここに表示される --> </div> </div> </div> @code { private ElementReference canvas; protected override async Task OnAfterRenderAsync(bool firstRender) { if (firstRender) { await JS.InvokeVoidAsync("game.initGame", canvas); } } } |
次に wwwroot フォルダのなかに style.css と game.js という名前で新しいファイルを作成します。また同じフォルダ内にある index.html を以下のように変更します。
wwwroot\index.html
|
1 2 3 4 5 6 7 8 9 10 11 12 13 14 15 16 17 18 19 20 21 22 23 24 25 26 27 28 29 30 31 32 |
<!DOCTYPE html> <html lang="en"> <head> <meta charset="utf-8" /> <meta name="viewport" content="width=device-width, initial-scale=1.0, maximum-scale=1.0, user-scalable=no, viewport-fit=cover" /> <title>MauiApp1</title> <base href="/" /> <link rel="stylesheet" href="style.css" /> <link rel="icon" href="data:,"> </head> <body> <div class="status-bar-safe-area"></div> <div id="app">Loading...</div> <div id="blazor-error-ui"> An unhandled error has occurred. <a href="" class="reload">Reload</a> <a class="dismiss">X</a> </div> <script src="_framework/blazor.webview.js" autostart="false"></script> <script type="module"> import * as game from "./game.js"; window.game = game; </script> </body> </html> |
wwwroot\style.css
|
1 2 3 4 5 6 7 8 9 10 11 12 13 14 15 16 17 18 19 20 21 22 23 24 25 26 27 28 29 30 31 32 33 34 |
html, body { font-family: 'Helvetica Neue', Helvetica, Arial, sans-serif; } a, .btn-link { color: #006bb7; } .btn-primary { color: #fff; background-color: #1b6ec2; border-color: #1861ac; } .btn:focus, .btn:active:focus, .btn-link.nav-link:focus, .form-control:focus, .form-check-input:focus { box-shadow: 0 0 0 0.1rem white, 0 0 0 0.25rem #258cfb; } html, body, #app, #game-page, #game-container { width: 100%; height: 100%; margin: 0; padding: 0; overflow: hidden; } #game-container canvas { display: block; width: 100%; height: 100%; margin: 0; padding: 0; touch-action: none; } |
game.js を以下のように記述します。これで canvas に画像が描画され、タップするとその位置に画像が移動します。
wwwroot\game.js
|
1 2 3 4 5 6 7 8 9 10 11 12 13 14 15 16 17 18 19 20 21 22 23 24 25 26 27 28 29 30 31 32 33 34 35 36 37 38 39 40 41 42 43 44 45 46 47 48 49 50 51 52 53 54 55 56 57 58 59 60 61 62 63 64 65 66 67 68 69 70 71 72 73 74 75 76 77 78 79 80 81 82 83 84 85 86 87 88 89 90 91 92 93 94 95 96 97 98 99 100 101 102 103 104 105 106 107 108 109 110 |
let canvas; let ctx; let image_pos = { x: 100, y: 100, width: 64, height: 64 }; let target = { x: 100, y: 100 }; let image; export function initGame(canvasElement) { canvas = canvasElement; ctx = canvas.getContext("2d"); image = new Image(); image.src = "image.png"; canvas.addEventListener("pointerdown", (ev) => onPointerDown(ev)); resizeCanvas(); window.addEventListener("resize", () => resizeCanvas()); requestAnimationFrame(gameLoop); } function resizeCanvas() { const container = document.getElementById("game-container"); if (!container) return; // game-container を強制的にリサイズする container.style.width = window.innerWidth + 'px'; container.style.height = (window.innerHeight - 50) + 'px'; const width = container.clientWidth; const height = container.clientHeight; const dpr = window.devicePixelRatio || 1; canvas.style.width = `${width}px`; canvas.style.height = `${height}px`; canvas.width = Math.floor(width * dpr); canvas.height = Math.floor(height * dpr); ctx.setTransform(dpr, 0, 0, dpr, 0, 0); } function onPointerDown(ev) { const rect = canvas.getBoundingClientRect(); target.x = ev.clientX - rect.left; target.y = ev.clientY - rect.top; } function gameLoop() { update(); draw(); requestAnimationFrame(() => gameLoop()); } function update() { const speed = 5; const dx = target.x - image_pos.x; const dy = target.y - image_pos.y; const distance = Math.sqrt(dx * dx + dy * dy); // ターゲットに向けて移動させる if (distance > 1) { image_pos.x += dx / distance * speed; image_pos.y += dy / distance * speed; // ターゲットの近くまで移動しているときは完全一致させる const dx2 = target.x - image_pos.x; const dy2 = target.y - image_pos.y; const distance2 = Math.sqrt(dx2 * dx2 + dy2 * dy2); if (distance2 < 5) { image_pos.x = target.x; image_pos.y = target.y; } } } function draw() { const width = canvas.clientWidth; const height = canvas.clientHeight; ctx.clearRect(0, 0, width, height); if (image.complete) { ctx.drawImage( image, image_pos.x - image_pos.width / 2, image_pos.y - image_pos.height / 2, image_pos.width, image_pos.height ); } } |
Google Play に登録する
完成したら実機テストをおこない問題なければ Google Play に登録します。まず Google Play Console のアカウントを作成してログインします。そのとき登録料(1 回限り)が必要です。
アプリを発行し、署名します。
アプリを発行するときは プロジェクトのプロパティの「Android パッケージ形式」(Android ⇒ オプション ⇒ Android パッケージ形式)を「バンドル」にします。そしてメニューから「発行」を選択します。処理が完了したら「配布」を選択、配布チャンネルは「アドホック」を選択します。署名IDを作成または既存の署名IDを選択したら「名前をつけて保存」します。これを手動でアップロードします。
配布チャンネルを「Google Play」にすると署名からアップロードまで自動でおこなうことができるのですが、初回は手動でアップロードするしかないのとエラーが発生したときにわかりにくいので全部手動でアップロードしたほうがわかりやすいと思います。
あとは内部テスト ⇒ クローズドテスト ⇒ 公開となるのですが、問題はクローズドテストです。内部テストであれば自分ひとりでできるのですが、クローズドテストは12人以上のテスターを集めて14日以上の期間をかけて実施しなければなりません。これは知り合いに協力してもらうか、SNSなどで募集して協力者をあつめてやってもらうしかありません。
とりあえずこんな感じのテスター募集ページを作成してみました。
【クローズドテスト参加者募集】個人開発Androidゲーム「Weighted Tic-Tac-Toe」
あとは知名度と交渉力で勝負するしかありません。
