レイヤーを使った簡単な画像編集ソフトを作成します。実はそれに関する記事も投稿しているのですが、一からやりなおします。
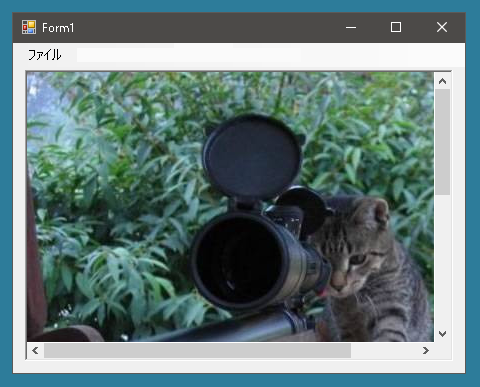
まず画像を表示させるためのピクチャーボックスをつくります。画像が大きくなった場合、スクロールバーがつくようにします。これならピクチャーボックスのクリックされた部分の座標も簡単に知ることができます。
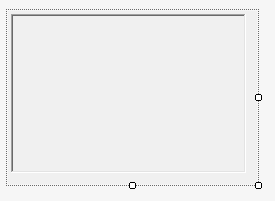
デザイナで以下のようなものを作ります。UserControlの上にピクチャーボックスを貼り付けているだけです。クラスの名前はScroolPictureBoxにしました。

スクロールバーがつくようにするにはまず自作クラス ScroolPictureBoxのAutoScrollプロパティを trueにします。そしてピクチャーボックスのSizeModeプロパティをPictureBoxSizeMode.AutoSizeにします。これで大きな画像が表示されるときはピクチャーボックスのサイズがこれにあわせて大きくなるのでScroolPictureBoxにスクロールバーが表示されるわけです。

ではScroolPictureBoxクラスがどうなっているかみてみましょう。Bitmapプロパティが変更されたら表示倍率をもとにGetBitmapForShow(Bitmap bitmap)メソッドで表示すべきBitmapを生成して表示させています。
またDisplayMagnificationプロパティが変更されたら表示倍率を変更してBitmapを表示しなおします。ScroolPictureBoxがリサイズされたときも同様に必要があればBitmapを生成しなおして表示させています。
それからBitmapを表示するときはピクチャーボックスとサイズを比較して縦横のどちらかが大きいときはピクチャーボックスのSizeModeプロパティをPictureBoxSizeMode.AutoSizeに変更します。そうでない場合はピクチャーボックスの大きさはScroolPictureBoxと同じ大きさにします。
ピクチャーボックスがクリックされたときに独自の処理ができるようにイベントハンドラPictureBox1_MouseDownを追加しています。
|
1 2 3 4 5 6 7 8 9 10 11 12 13 14 15 16 17 18 19 20 21 22 23 24 25 26 27 28 29 30 31 32 33 34 35 36 37 38 39 40 41 42 43 44 45 46 47 48 49 50 51 52 53 54 55 56 57 58 59 60 61 62 63 64 65 66 67 68 69 70 71 72 73 74 75 76 77 78 79 80 81 |
public partial class ScroolPictureBox : UserControl { public ScroolPictureBox() { InitializeComponent(); pictureBox1.Location = new Point(0, 0); pictureBox1.SizeMode = PictureBoxSizeMode.AutoSize; pictureBox1.MouseDown += PictureBox1_MouseDown; } double _displayMagnification = 1; public double DisplayMagnification { get { return _displayMagnification; } set { _displayMagnification = value; Bitmap = Bitmap; } } Bitmap _bitmap = null; public Bitmap Bitmap { get { return _bitmap; } set { _bitmap = value; pictureBox1.Image = GetBitmapForShow(value); OnResize(); } } void OnResize() { if (Bitmap == null) { pictureBox1.Size = new Size(this.Width - 2, this.Height - 2); return; } if (this.Width < Bitmap.Width || this.Height < Bitmap.Height) { pictureBox1.SizeMode = PictureBoxSizeMode.AutoSize; } else { pictureBox1.SizeMode = PictureBoxSizeMode.Normal; pictureBox1.Size = Bitmap.Size; } pictureBox1.BorderStyle = BorderStyle.None; this.BorderStyle = BorderStyle.Fixed3D; } protected override void OnResize(EventArgs e) { OnResize(); base.OnResize(e); } Bitmap GetBitmapForShow(Bitmap bitmap) { if (bitmap == null) return null; int newWidth = (int)(bitmap.Width * DisplayMagnification); int newHeight = (int)(bitmap.Height * DisplayMagnification); Bitmap newBitmap = new Bitmap(newWidth, newHeight); Graphics g = Graphics.FromImage(newBitmap); g.DrawImage(bitmap, new Rectangle(0, 0, newWidth, newHeight), new Rectangle(0, 0, bitmap.Width, bitmap.Height), GraphicsUnit.Pixel); g.Dispose(); return newBitmap; } public delegate void PictureBoxMouseDownHandler(object sender, MouseEventArgs e); public event PictureBoxMouseDownHandler PictureBoxMouseDown; private void PictureBox1_MouseDown(object sender, MouseEventArgs e) { PictureBoxMouseDown?.Invoke(this, e); } } |
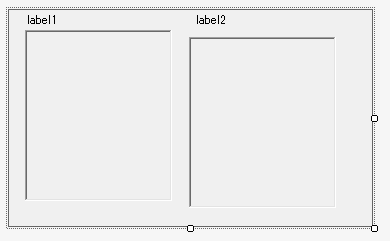
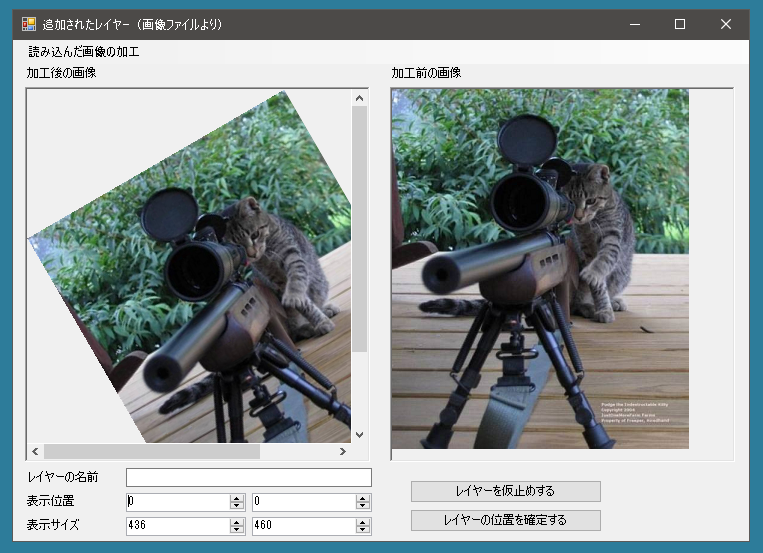
それからこの自作のピクチャーボックスをふたつ並べて表示するユーザーコントロールを作成します。編集前と後を比較できるようにします。


|
1 2 3 4 5 6 7 8 9 10 11 12 13 14 15 16 17 18 19 20 21 22 23 24 25 26 27 28 29 30 31 32 33 34 35 36 37 38 39 40 41 42 43 44 45 46 47 48 49 50 51 52 53 54 55 56 57 58 59 60 61 62 |
public partial class PictureBoxBeforeAfter : UserControl { public PictureBoxBeforeAfter() { InitializeComponent(); } private void PictureBoxBeforeAfter_Load(object sender, EventArgs e) { this.BorderStyle = BorderStyle.None; } public Bitmap AfterBitmap { get { return AfterPictureBox.Bitmap; } set { AfterPictureBox.Bitmap = value; } } public Bitmap BeforeBitmap { get { return BeforePictureBox.Bitmap; } set { BeforePictureBox.Bitmap = value; } } void OnResize() { int split = 20; AfterPictureBox.Location = new Point(0, 20); AfterPictureBox.Size = new Size(this.Width / 2 - split / 2, this.Height - 20); BeforePictureBox.Location = new Point(this.Width / 2 + split / 2, 20); BeforePictureBox.Size = new Size(this.Width / 2 - split / 2, this.Height - 20); label1.Location = new Point(0, 0); label2.Location = new Point(this.Width / 2 + split / 2, 0); } // 右側のピクチャーボックスの上に表示される文字(例:編集前) public string BeforeLabelText { get { return label2.Text; } set { label2.Text = value; } } // 左側のピクチャーボックスの上に表示される文字(例:編集後) public string AfterLabelText { get { return label1.Text; } set { label1.Text = value; } } protected override void OnResize(EventArgs e) { OnResize(); base.OnResize(e); } } |
次にレイヤーを管理するクラスを作成します。レイヤーで扱うものとして画像や文字列、図形などが考えられます。それらの基底クラスとしてLayerクラスを作ります。ファイルはバイナリではなくXML形式で保存します。
|
1 2 3 4 5 6 7 8 9 10 11 12 13 14 15 16 17 18 19 20 21 22 23 24 25 26 27 28 29 30 31 32 33 34 35 36 37 38 39 40 41 42 |
public class Layer { [System.Xml.Serialization.XmlIgnore] public virtual Bitmap Bitmap { get { return null; } } public string Name = ""; public int Width = 0; public int Height = 0; public int X = 0; public int Y = 0; public int Z = 0; [System.Xml.Serialization.XmlIgnore] public int Left { get { return X; } } [System.Xml.Serialization.XmlIgnore] public int Right { get { return X + Width; } } [System.Xml.Serialization.XmlIgnore] public int Top { get { return Y; } } [System.Xml.Serialization.XmlIgnore] public int Bottom { get { return Y + Height; } } } |
